by A Lemon Squeezy Home
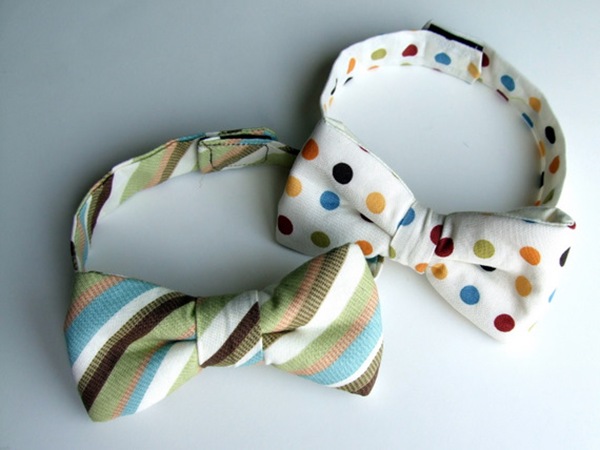
Tutorial - Does a little boy in your life need a Bow Tie and if not he will have fun wearing one.
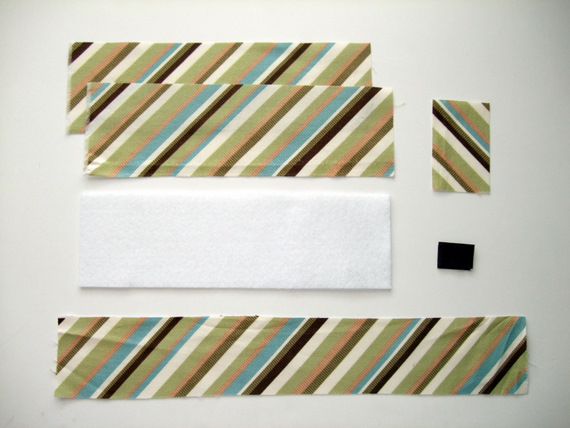
Here's what you'll need:
-Two 3" x 10" pieces of patterned fabric (it doesn't have to be the same on each side, as one piece barely shows at all, so just match it if you'd like)
-One 3" x 10" piece fleece or felt. I liked the way the fleece made for a more fluffy and full bow tie. The felt works great to. **Please see note below on the felt recommendations** (I used the felt so that the bow wouldn't be floppy and would hold it's shape) Edited to add: I was thinking of using some thick iron on interfacing, but I didnt' have any, so I didn't try that. Alida, from I Make Stuff said she used fusible stabilizer and said it worked great! Thanks for the great tip!
-1" piece velcro
-one piece matching fabric measuring 2.5" x 4"
-one long strip measuring 3" x about 15" (depending on your child's neck size) *please see note below on how to fit this just right*
To measure the long strip that is about 3" x 15", have your child put on the shirt he/she will wear it with. Or if it's just a shirt without a collar, don't worry about that. But either way, measure around the part the bow tie strap will be. Add 2" to that measurement for the strap length.
*

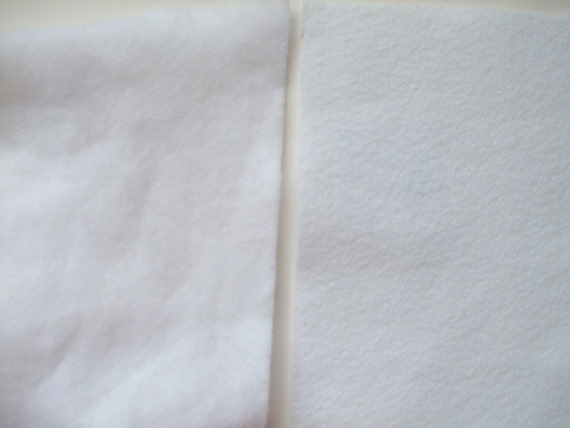
**I used the felt I bought off the bolt for the first bow tie and it worked great (on left side in picture). On the second one I made, I used the small sheets of felt you can buy (right side in picture). My machine had a hard time sewing through the felt sheet. I suggest using the kind you have them cut--you can see how much fluffier and soft it is in the picture.
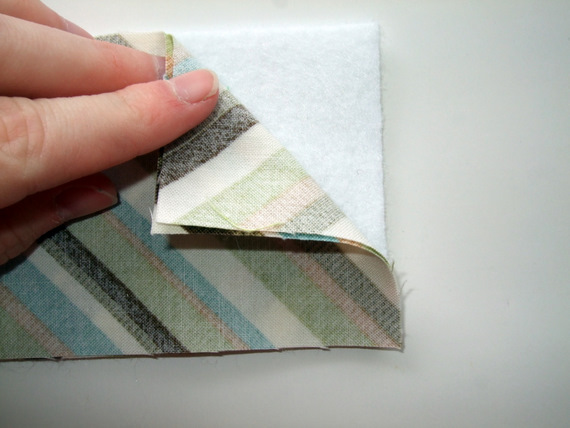
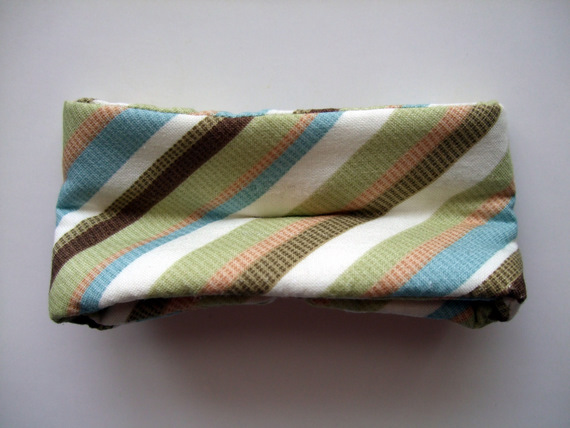
Take the 3 pieces cut to 3" x 10". Place the right sides together of fabric, and then the felt under that.
Sew 1/4" seam around the whole thing, leaving about a 2" gap at one of the ends. Clip corners.
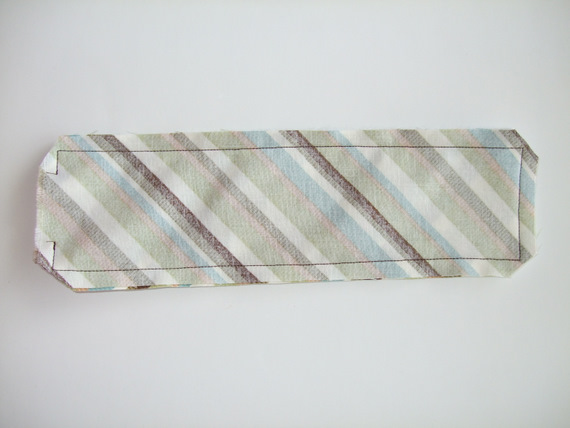
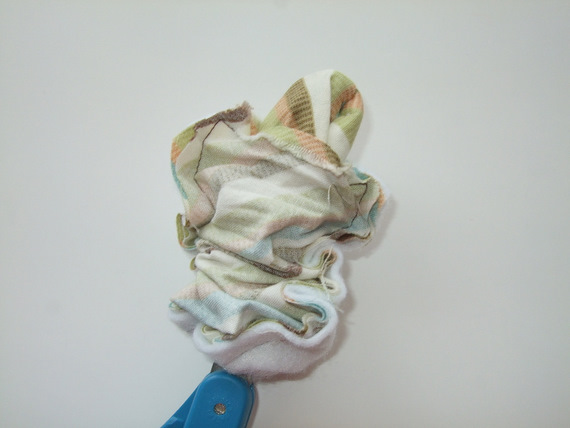
Turn right side out. I used my scissors to help with this. Just make sure that you are turning right side out between the two outer fabric pieces, so the felt ends up on the inside still.
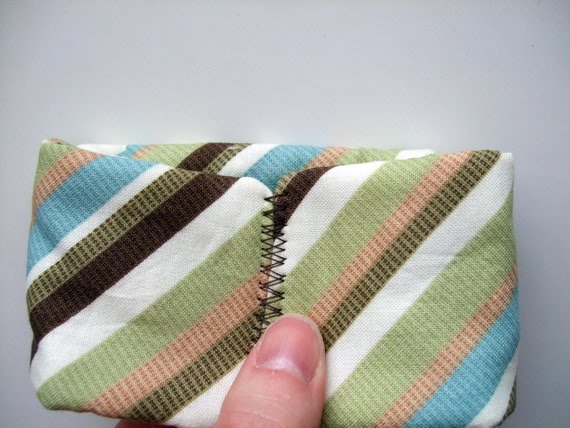
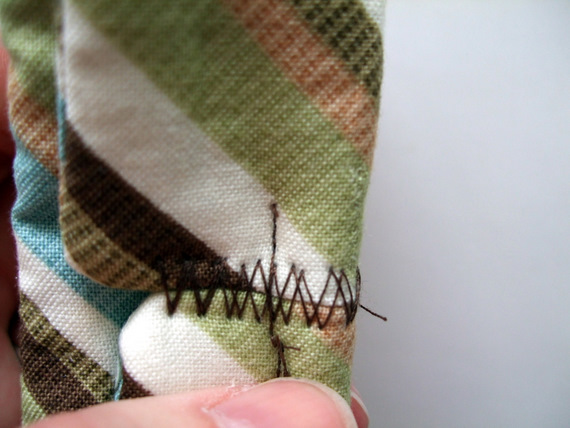
Zig Zag the two ends together, tucking in the unfinished edge. So you'll have a piece that's joined together at both short ends, like a ring.
Fold together like the following two pictures show:
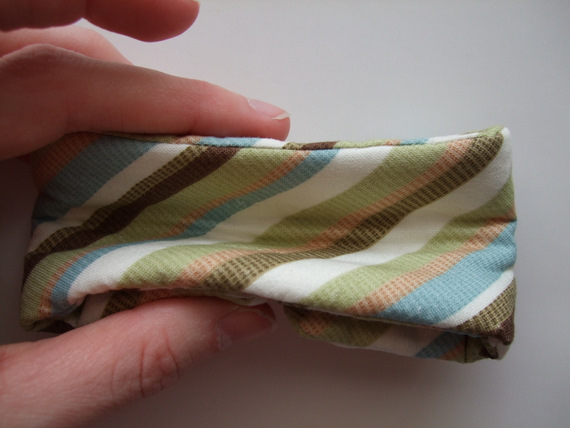

Sew an inch long seam in the center, about 1/2" from the edge, through all the layers. You might have to sew slowly, and it might have to be with a heavy duty needle. Like I said above, it worked great with the lighter and fluffier felt from the bolt, but not as well with the sheet of felt. AND as you can see, I should have lined up my edges better! Oops:).
So now you'll have this:
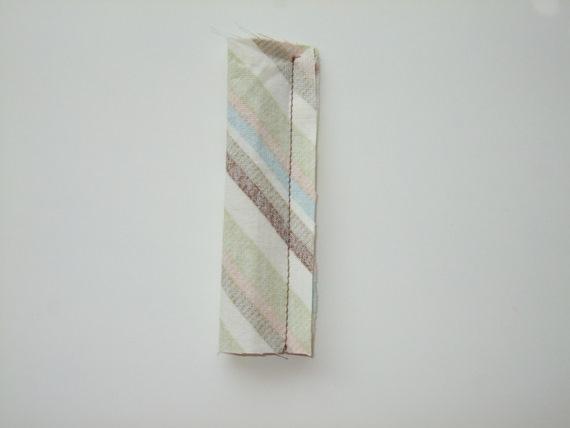
Take the small 2.5" x 4" scrap of fabric and sew 1/4" seam, wrong sides together. Turn right side out.
Look at the picture below. See the dotted lines? That is where you want to have a crease, on each folded line. So you make the top of the bow and the bottom of the bow even with the pucker you sewed on the back, making two folds along the dotted lines. Wrap the little piece you just sewed together around the bow.

Tuck the raw edges under and sew around the bow. Hopefully you can see in this next picture what I was talking about in the previous step with the squeezing the top and bottom of the bow together to match the middle sewn section.

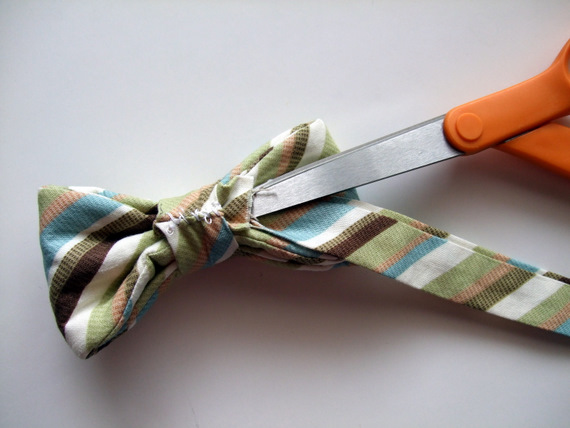
Sew your long strap together the same as the middle, small fabric piece. Turn right side out. Fold over one edge and stick your scissors there.

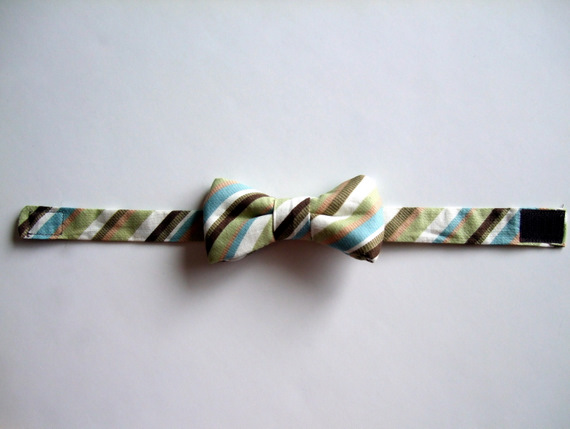
Tuck the strap under the middle of the bow tie.
Pull strap through. Take the velcro and sew on opposite sides of the long strap. Tuck in the raw edges before sewing on the velcro. I made sure to sew the scratchy side on the part that would have less contact with skin:).
No comments:
Post a Comment