via OhDeeDoh
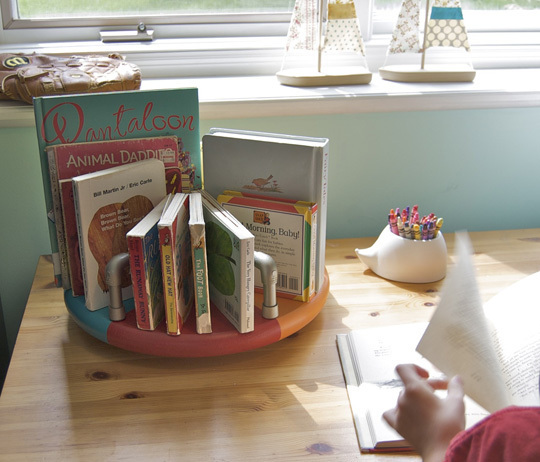 How-To - This is a great way to display favorite books and fun to make.


Materials
• wooden lazy susan
• 4 ft of 1/4" PVC pipe
• 10 1/4" PVC end caps
• 10 1/4" PVC 90 degree elbows
• acrylic paint in various colors
• water based polyurethane
• silver spray paint for plastic
• PVC cement (optional)
• 10 screws
Instructions
Step 1
Cut the PVC pipe into 15 pieces that are each 3 inches in length. PVC is very easy to cut with a handsaw, but a power saw is much faster. We used the tan pipes that are made for hot and cold water because they are narrower than the white 1/4" pipe.
Step 2
Put the pieces together as shown in the picture to form 5 little handrails. Don't glue them together because you'll be taking them apart later. Spray paint the handrails with spray paint intended for use on plastic.
Step 3
Paint your lazy susan with acrylic paints. If you are using a new or thrifted one, you will need to scuff the surface with fine sandpaper so the paint will adhere. We actually made ours with a pre-cut unfinished wood circle and a lazy susan gear. Seal with a coat of water based polyurethane. Let dry.
Step 4
Set one handrail onto the lazy susan where you want it to be attached. Lift the upper pieces off while leaving the endcaps sitting on the lazy susan. Drill a small hole into the center of each endcap and into the wood. Drive a screw into the hole. Make sure your screws are not too long. You don't want them to poke down onto the bottom of the lazy susan and impede the turning action. Repeat for all the handrails.
Step 5
If you want to, you can glue the handrail structure together before attaching it to the endcaps. This is optional. We just popped ours into place, and it fits really tightly. If you are concerned about your kids pulling the handrails off, you can purchase some PVC cement or plastic adhesive and follow the manufacturers directions.
You're done! Great job!
(Images: Katie Steuernagle)
No comments:
Post a Comment