by Cutesy Crafts

Jessica at Cutesy Crafts has provided this fabulous tutorial.
Most of the products were purchased on Amazon.
Now onto our project!
Materials (with product links):
-1 gallon blue paint
-1 gallon green paint
-1 quart white paint
-1 quart magnetic paint (Wall Magnetic Paint - Magprime-1 Qt Wall Magn Paint


-large roller
-small roller
-any other brushes, drop cloths, buckets, or paint trays you find necessary
-tape (Frog Tape 82011 Pro Painters Masking Tape, Green 1-Inch by 60-Yards

-laser level or long regular level
-ruler or tape measure
-pencil
-1 inch flat head paint brush
-wooden cars
-magnets (Magcraft NSN0573 3/8-Inch by 1/8-Inch Rare Earth Disc Magnets, 30-Count

-hot glue gun
-fabric scraps (felt and other)
Step 1: Put up your tape - Figure out how high up you want your road. I used the bottom of the window as a starting point. Make sure to check both sides of the window... mine was not level for some reason, so the taping on one half of the room was a little closer to the ground than the other half. Annoying right? But you can't tell. The distance between the top of the higher piece of tape and the bottom of the lower piece of tape is 7 inches. I used a laser level to get everything really straight and marked it with a pencil. You can use something else, but it may be more difficult.
***The dotted line - I forgot to include this when I did the project until later. Now, however would be the best time. There are a couple of ways to do this part. If you want to get it done quickly, you can just put up a third strip of tape in the middle and seal it the same as the others. If you are a perfectionist, then you can attempt to cut small strips of tape and space them evenly across the middle of the road to create the line. Keep in mind that you will need to seal each one (see step 2). I opted for the easier method. See a photo in step 4.***
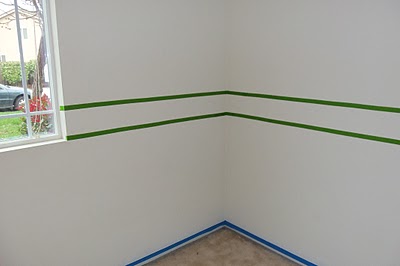
Note: I started my project with white walls. If your walls are not white, you will want to paint the area that is going to have the road on it white and let it completely dry before you start anything. Check the tape manufacturer's suggestions on how to use tape on newly painted walls.
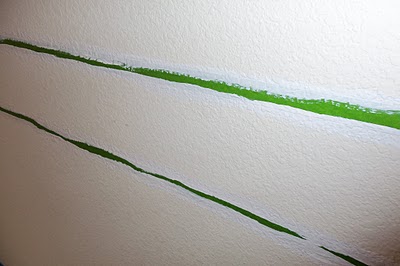
Step 2: Sealing the Tape - The green tape you see is this stuff called Frog Tape
 here. I would do this even if you don't have textured walls. It gave me some really great lines!
As per the Frog Tape site's instructions, push the tape into all the "nooks and crannies" on the wall. They recommend using a 5-in-1 tool to press it down, but I found that started to scrape the tape. I used my nylon pan scraper from pampered chef instead. It worked really well. If you don't have one you can find something else around the house. You need to get really up close and personal with your wall. I can tell the parts where I got lazy and did not push the tape into every nook.

Next, you want to take a white paint that is the same or close to the color of your white wall and use a brush to paint along the edges of the tape. This will activate the tape sealer and prevent the colored paint from seeping through. Let it dry completely.
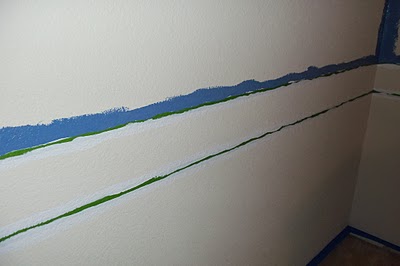
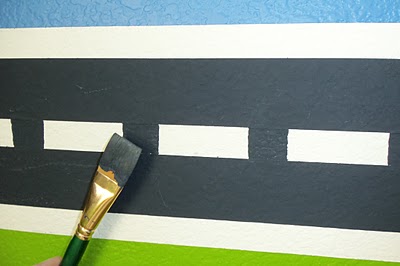
Step 3: Paint your colors - Once your white paint is dry use your paint brush to paint over it again with the color you are going to use, then fill in the rest with your large roller. See the picture below. Do the same with the green.
Step 4: Magnetic Paint - Here you can see the third stripe of tape for the dotted line. Make sure to get your paint mixed at the store before using it. Shake it and mix it up again really well before and during painting. If you don't mix it well, all of the metallic paint will sink to the bottom of the can, and you will get bad results. Take your small roller and paint 3 coats, letting the paint dry between each coat. Follow the instructions on the can. Since this is a primer, I was going to paint a gray paint over it, but I liked the asphalt look. You can do what you like.
I used a magnetic primer called Magprime


***Important note about the paint: It does leave it's own "texture" on the wall because of it's thickness. The can said to smooth with a foam brush while wet, which I neglected to do. This may have been the reason for this texture. I still think it looks good, but if we ever want to paint over it, we may have a problem. Do your own research and try a bit before you paint the whole wall to see if you are OK with it. The can says that you can paint over wallpaper with it, so maybe that would be a good option for you. Again, you would have to test this out.***
Step 5: Pull the tape off - This was my FAVORITE part! The Frog Tape site says to use a blade to do this, but I did not find it necessary. The lines were so straight!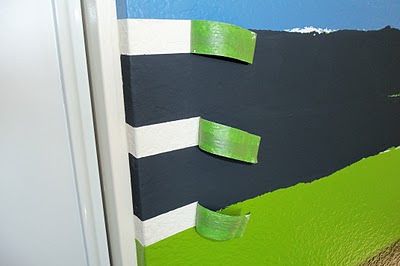

Step 6: Separate the dotted line - I painted a 1 inch square with the magnetic paint every 3 inches along the middle white line. I used a 1 inch, flat head brush that I had from an art class that I took a while back. It's not perfect, but you can't tell unless you look very closely.
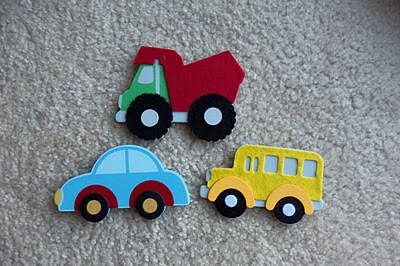
Step 7: Make your magnetic cars - You should be able to pick up these wooden vehicles at your local craft store for less than a dollar a piece.
If you do not buy anything else online, you will at least want to buy these Rare Earth Disc Magnets

Use your hot glue gun to glue two magnets to the back of each vehicle. Cut a scrap of fabric, turn under the edges so they don't fray, and hot glue it over the magnets. That way, if the magnets fall off for some reason, they will be inside this pocket of fabric.

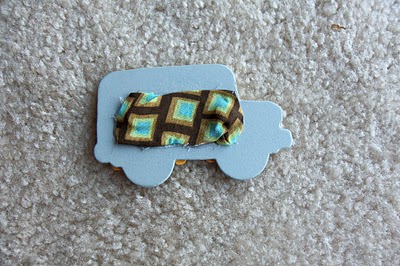
Cut 2 pieces of felt to cover the spots where the magnets will be touching the wall. Use the hot glue gun to glue these on as well. This protects the pocket of fabric and the wall when your kids "drive" the cars along the road. If you want to be extra crafty, you could sew the magnets in between the felt and the fabric. That way there would be less chance of your kids getting hold of them too.

The result is not pretty, but no one is going to see the back anyway right?
No comments:
Post a Comment