by Thrifty Decor Chick

Tutorial - What a great idea. 
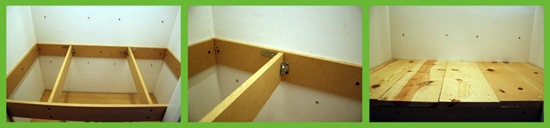
Start with the base, and this part was all scrap mdf from another project.
I’ll show you pics and then explain:
I did my measurements and laid everything out to make sure it would work. Then I started securing everything to the walls with long screws.
I did not take the baseboards off. Our baseboards are practically soldered onto our walls, so they stayed. And they gave me a good strong base to secure the mdf to.
I added the center support and screwed in in from the front (it split the mdf a bit, which is OK.) On the back part I just screwed it in from an angle.
Then I covered it with slats of scrap mdf:
I used a bead of wood glue first, then my nail gun to secure it along the frame.
You can see that I didn’t use one big piece of mdf – I was trying to use what I had, so I just cut them to the right length and made them work.
Then it was on to the bench! I used more scrap mdf for this one too:
I did this one very similar to the bottom base. The main difference was finding the studs – as many as possible! And our closet only had three – one on each wall.
I was a bit concerned that three wouldn’t hold up, so I added screws in the corners (where I knew the closet was framed) to get some more support. I held up the center braces with brackets I had in my stash.
Then I took wood from our old DIY sofa table to make the seat. I installed them in that direction (coming out from the back of the closet) because five of those boards just happened to fit perfect that way.
If you don’t have scrap wood for a project like this, just have a piece of wood or plywood cut to the exact size of your bench. (Hardware stores will do this for you!)
Because I installed the wood that direction, and I was working around the door frame inside the closet, the wood didn’t match up just right at the front. I used a piece of scrap wood from our powder room across the front:
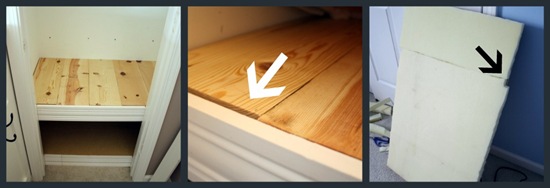
But there were still gaps. I thought I could cover that with the seat cushion, so I just cut the foam with a little bump out so it would cover all the gaps.
I made the cushion.
I even used scrap foam (I scored a big roll at Goodwill a couple of years ago) for the seat cushion!
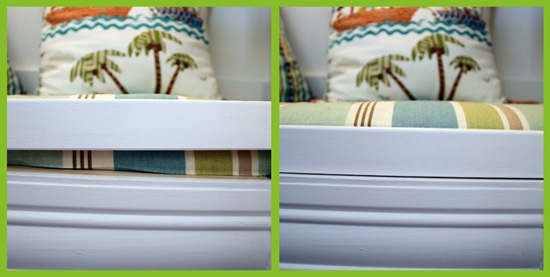
Because I didn’t have a ton of studs to work with, I was a bit nervous about the stability of the bench. I sat on it over and over and it was fine, but wanted to add a little somethin’ to make it even more sturdy.
It was suggested a couple more supports against the door frame:

And it did the trick! I have no doubt this will hold up to many sits for many years. :)
(And no, I didn’t fill the holes under there.)
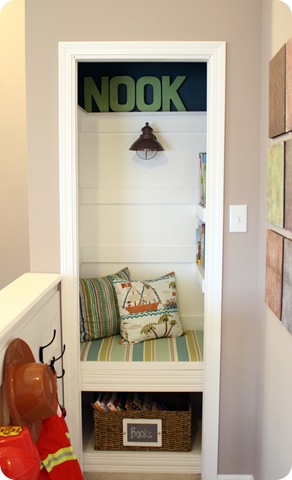
The bench was DONE –
So it was onto the shelves.
I used a 1” x 2” piece of wood to build a bracket:

Then I used more scrap wood from the sofa table (hence the brown!) and nailed it into the “bracket.” I finished it off with a piece of mdf on the front, and then just painted it underneath so it melted in with the wall.
**If I was really good (and patient) I would have covered the bottom with another piece of wood…but I’m not. :)
There’s a few issues I hit as I went through the process, and I figured them out along the way. The first was covering where the hinges and the strike on the door frame were.
I got a couple of pieces of the thin lattice boards and nailed them over the frame:

The top piece was another scrap, so it’s a tiny bit thicker. I caulked the hinge part (picture on the left) and still need to do that a bit more up in the corners.
My cushion idea (cutting the foam to hang over a bit) worked pretty well, but then my (not good) cutting job on the foam was showing through and it was driving me crayyyyzay. (It was ragged and you could tell.)
I found more scrap wood, cut it to the exact right size, and then wedged it into the door frame right in front of the cushion:
Usually I miter the corners of the mdf at 45 degree angles, but this time I just butt them up against each other and it worked great!:
You can see how they meet up from underneath:

I still need to caulk a few spots, but this gives you an idea.
I didn’t continue the mdf around the back of the bookshelves:
I knew it would take up valuable book space. And you can’t see back there with the books anyway. :)
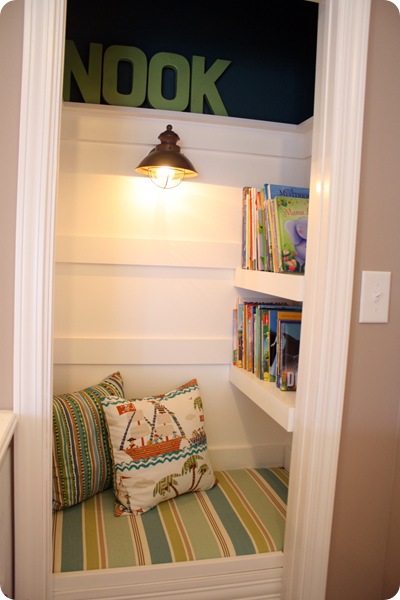
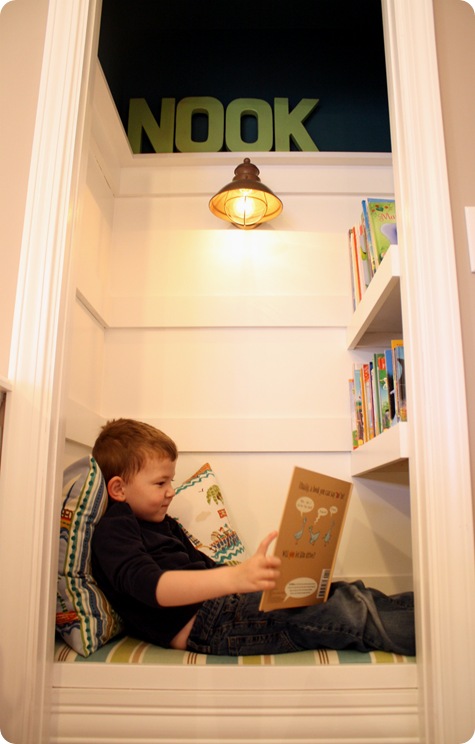
Now…for the goodies – the sources for the cute stuff!
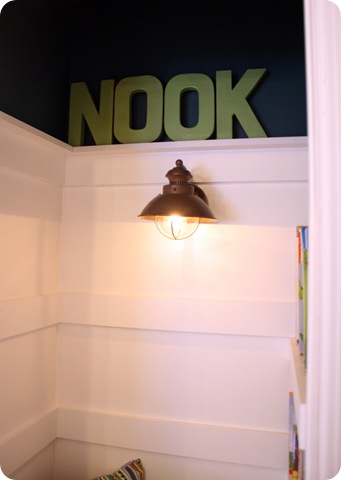
The light was from Menards for $12, but I was at Lowe’s today and found this cutie for about $18:
The basket was from TJ Maxx (already had it) and the “book” label was a cheap chalkboard from Joann’s that’s been in the basement:

The “NOOK” letters are cardboard, also from Joann’s, and spray painted in Pistachio spray paint (from Valspar I believe?)
The fabric is from Joann’s as well – I only need a bit so it was less than $10!
Oh, and the cutie pirate pillows were a HomeGoods find a few weeks ago, $10 each. I love how all of the colors came together!!
Throw all that together, and you get the cutest book nook I ever did see:

I am playing with the idea of a drape off to the side – hubby thinks it would be so cool.I hope that helps! It was NOT hard! I promise you. It just took time and patience. I’ve never built anything on my own, and this went so well for me.
And I had a blast doing it!
If you have any additional questions, please let me know and I’ll answer them in the comments!
Thanks again for all the love on this project!

I covered most of the holes with those boards. SCORE!
The bookshelves fit perfectly in the little recess inside the closet:


The fact that it’s new storage for half of his books is just a bonus.


No comments:
Post a Comment