by Kalleen at At Second Street
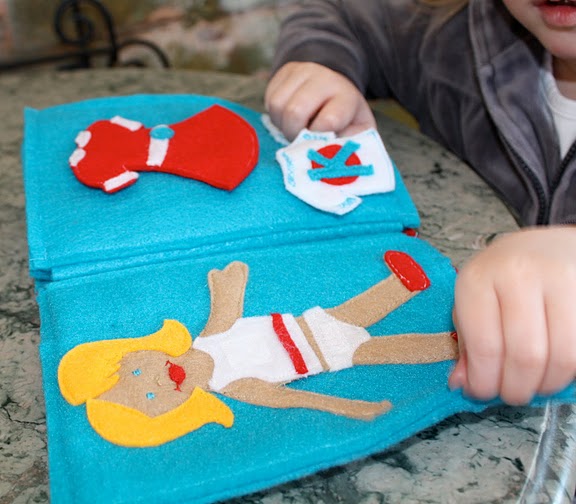
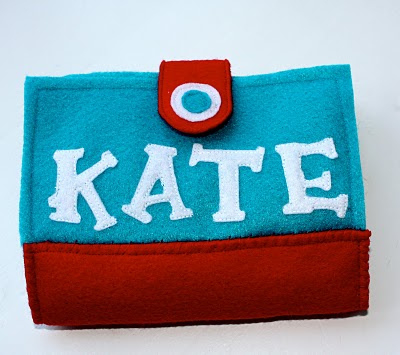
Tutorial - Looking for something to keep your kids happy while on the go? Something you can pack along when you're out shopping, at a restaurant, waiting at the doctors office or even driving in the car? I was tired of handing over my iphone every time I needed entertainment on the go. I needed something fun and entertaining yet inexpensive and compact. This personalized On The Go Book will grab any kids attention.
Made of inexpensive felt, this book is just the right size to go in mom's bag.
It comes with three activities:
Dress-up
Tic-Tac-Toe
and Coloring

My kids love it, especially because they saw mom making making it just for them.
Materials you'll need
-10 sheets of felt (the best price I found was Walmart for ¢25)
-4 of one color for main pages of book
-2 of one color for embellishments
-2 more of a different color for embellishments
- one skin colored piece
- one hair colored piece
-flexible sew-on Velcro tape. (I bought a pack of 30 feet with a coupon and only used a small amount)
-8 pack of crayons
-small note pad
Step 1:
Cutting out main pages
I cut eight 5 x 7 pieces of felt in the same color
I used my paper cutter to make it easy. Any method would work.

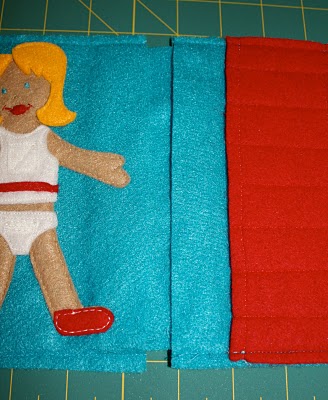
I started by drawing a picture of a paper doll.
I traced the hair onto another piece of paper then cut the doll out of the paper. Holding the paper doll in place, I cut the doll out of the skin colored felt.

Ignore the ears, they didn't work. I sewed the body down by sewing a small seam around the edges.

I cut the undergarments following the same process as the body. I sewed them into place and added a piece of the soft sided Velcro to the tank top and underwear. I hand sewed the face on with normal thread. I used a small red felt oval for the mouth.

The last step is cutting the hair out and sewing it into place.

I followed the same process for the clothes. I traced the body onto a new piece of paper and drew clothes onto it. I cut them out of the paper and then the felt.

*I cut each main piece of clothing out twice, one for the front and one for the back. After embellishing the front side and adding the sticky sided Velcro to the back side I would sew the two pieces together.
For the shirt I first sewed down the embellishments. Then I placed the t-shirt pattern on top and cut it out.

for the ruffled skirt I cut the front out a little longer than the back. I did a wide stitch by hand across the top and pulled it to the same width as the back piece. This created the gather.
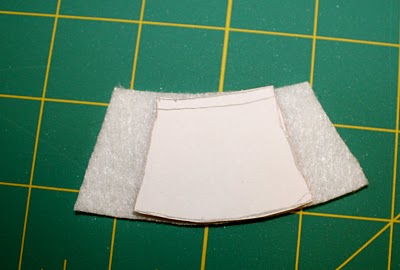
Once the front was embellished and I sewed a sticky sided piece of Velcro to the back I sewed the two sides together.

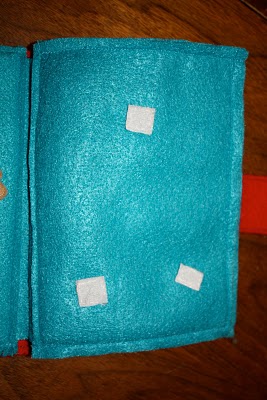
The last thing I needed to do for page two is add soft sided Velcro to stick the clothes down. They can go anywhere as long as all three pieces of clothing fit onto the page once they are attached to the Velcro.
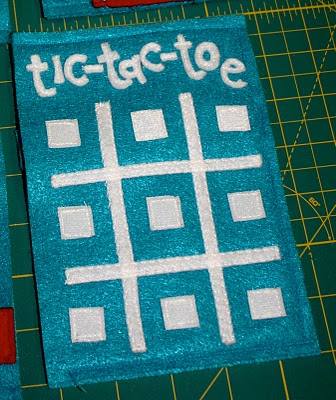
Step 3: Constructing pages 3 and 4, tic- tac- toe

First I made my x's and o's. I used the same method as the clothes. I layered three circles for the o's. The main white piece of each O is a 1-3/8" circle and the red circle is 1" and the small white circle is 1/2".

I sewed the letters onto the white felt first then cut out the main circle. Once each letter is sew down and cut out I sewed it to a back circle that had a sticky sided piece of Velcro attached.

For the main page I sewed down ten pieces of soft sided Velcro. Nine in rows and one on a 1 x 5 strip of red felt.

For the grid I used 1/4" strips of white felt. I cut the letters out of the white freehand.

This is the easiest page. I think a book with just this activity would be simple and fun as well.

I cut these letters free hand as well. I sewed two 1 x 5 strips of blue together by sewing around the edges. Then I sewed it into place by zig zagging up and down near the edges of the strip.

I cut two red circles and sewed them over the zig zag stitches.

For the crayon page I started with two strips of red felt, 2-1/2 x 7. I sewed them together by doing a 1/4" seam at the top and bottom.

I centered the strip in the middle. Holding it into place I sewed my first line down the middle. Then I sewed three more lines in both directions every 3/4".

I used a stencil for the lettering on the front. You can choose a font you like and print it out as a pattern. Cut the letters out using the same method as all the other embellishments. I used another white circle to disguise a piece of soft Velcro placed 1/2" down from the top.

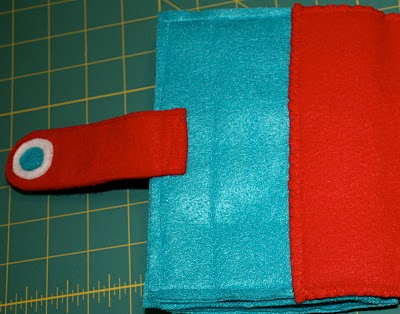
I left the back plain except for the strap. To make the strap, I cut two 1-1/2" x 5" strips. Holding them together I rounded one end using the curve of one of my tic-tac-toe circles as a guide. I embellished one strip with two smaller circles, the same sizes used in tic-tac-toe. After adding a piece of sticky velcro to the other strip I sewed the two pieces together. I sewed the strap 1/4" down from the top of the back piece after finding the middle. I sewed a triangle and then an x in the middle, to secure it.
Step 6: sewing the pages together
I wasn't able to get a good picture of this step. What I did was stack my pages up, back sides together, as if they were sewn together in the book. The cover will be on top and the back on the bottom. Then I sewed the pages together. The front page was on the other side of the paper doll. The clothes were on the other side of the x's and o's. The tic-tac-toe was on the other side of the note book page. And the crayons were on the other side of the back.
*Sew the pages together by sewing the top bottom and outer side of the pages 1/4". DO NOT sew up the inner side of the pages. Be careful. I had to unpick a page or two.
When you are done you will now have four double sided pages.

I started by connecting the two outer pages. I tucked a 2" x 7" strip into the inner openings of the pages.

I evenly tucked the felt into both sides till there was 1/2" between the two pages. Then I sewed a 1/4" seam down both pages. I repeated this step with the two inner pages.
Finally, I lined up the middle pages on top of the outer pages and sewed a seam down the middle.

I cut two 3-1/2" x 7" strips. I sewed them together with a 1/4" seam around the edges.

I positioned the strip were I wanted it and hand stitched it into place.


Finally done!
I hope yours is well loved.
No comments:
Post a Comment