via Oh Happy Day
Today's post is by the talented Michaela of Blissful Fetes. This idea is so versatile and would work great with letters or numbers.

Perfect for the next birthday party.Hi readers of Oh Happy Day! I've been following Jordan's blog for years and I feel so very honored and excited to be sharing this DIY project with your here today. The idea is based on Jordan's fringey streamers - I planned to use them as decor for my daughter's 2nd birthday parties and was looking for other decor elements to match. I'm usually all about the cute, small details, but this time I decided to go for a big impact.
Here's what you need
- crepe paper sheets (I used 5 full sheets for this one)
- painter's tape or masking tape
- scissors
- paper glue
- chalk or pencil to draw the outlines
- an empty wall, preferably not covered with delicate wallpaper
Start by sketching the outlines of the number or letter onto the wall. I used brown chalk that will come off easily. A pencil would work, too - just test it before.
Cut the crepe paper into strips just like you'd do for the fringey streamers - only a bit wider. Cut into it from both sides as shown in Jordan's tutorial.
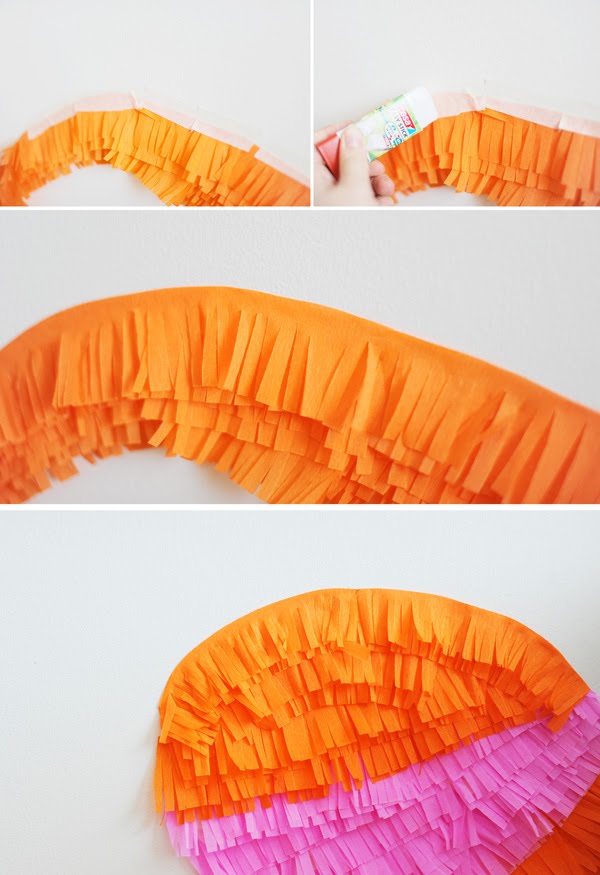
Open the crepe strip and fold it in half as shown below, leaving the lower side slightly longer than the top one. Now you can start sticking it onto the wall, into the sketched shape. Start with the very bottom of the shape. Attach it with pieces of painter's tape - these will come off very easily when you take the decor down (to make sure, also test this before).
Around the corners, cut off overlapping parts of the crepe paper to fit the sketched shape. Layer strip after strip using the same technique.

Instead of using tape, you need to attach the top crepe paper strips with paper glue, in order to end up with a neat shape. You probably don't want to stick the glue directly onto your wall, so stick a row of tape underneath following the outline of the sketch. Then simply attach a strip of paper to it as shown in the picture.


This is not a super quick project, but soon enough you're done! This 5"10 tall number 2 took me about 1.5 hours including the time to take the pictures for this tutorial.

The leftover sheets you can cut into confetti. The crepe paper makes it very light and fluttery.
Ella loved the confetti mess in the living room!
All photos by Michaela for Oh Happy Day
No comments:
Post a Comment